

Scenes and triggers are the most important tool of HomePilot. You need scenes and triggers to automate your devices, to control transmitters with devices or to go to certain destinations.
Scenes group devices with specific destinations, triggers trigger the scenes.
All information about the triggers can be found under the following link:
What are triggers?
In the videos we first explain the differences between groups and scenes, in the further videos we show examples for creating triggers and linking them to scenes.
SCENES:
What is a scene?
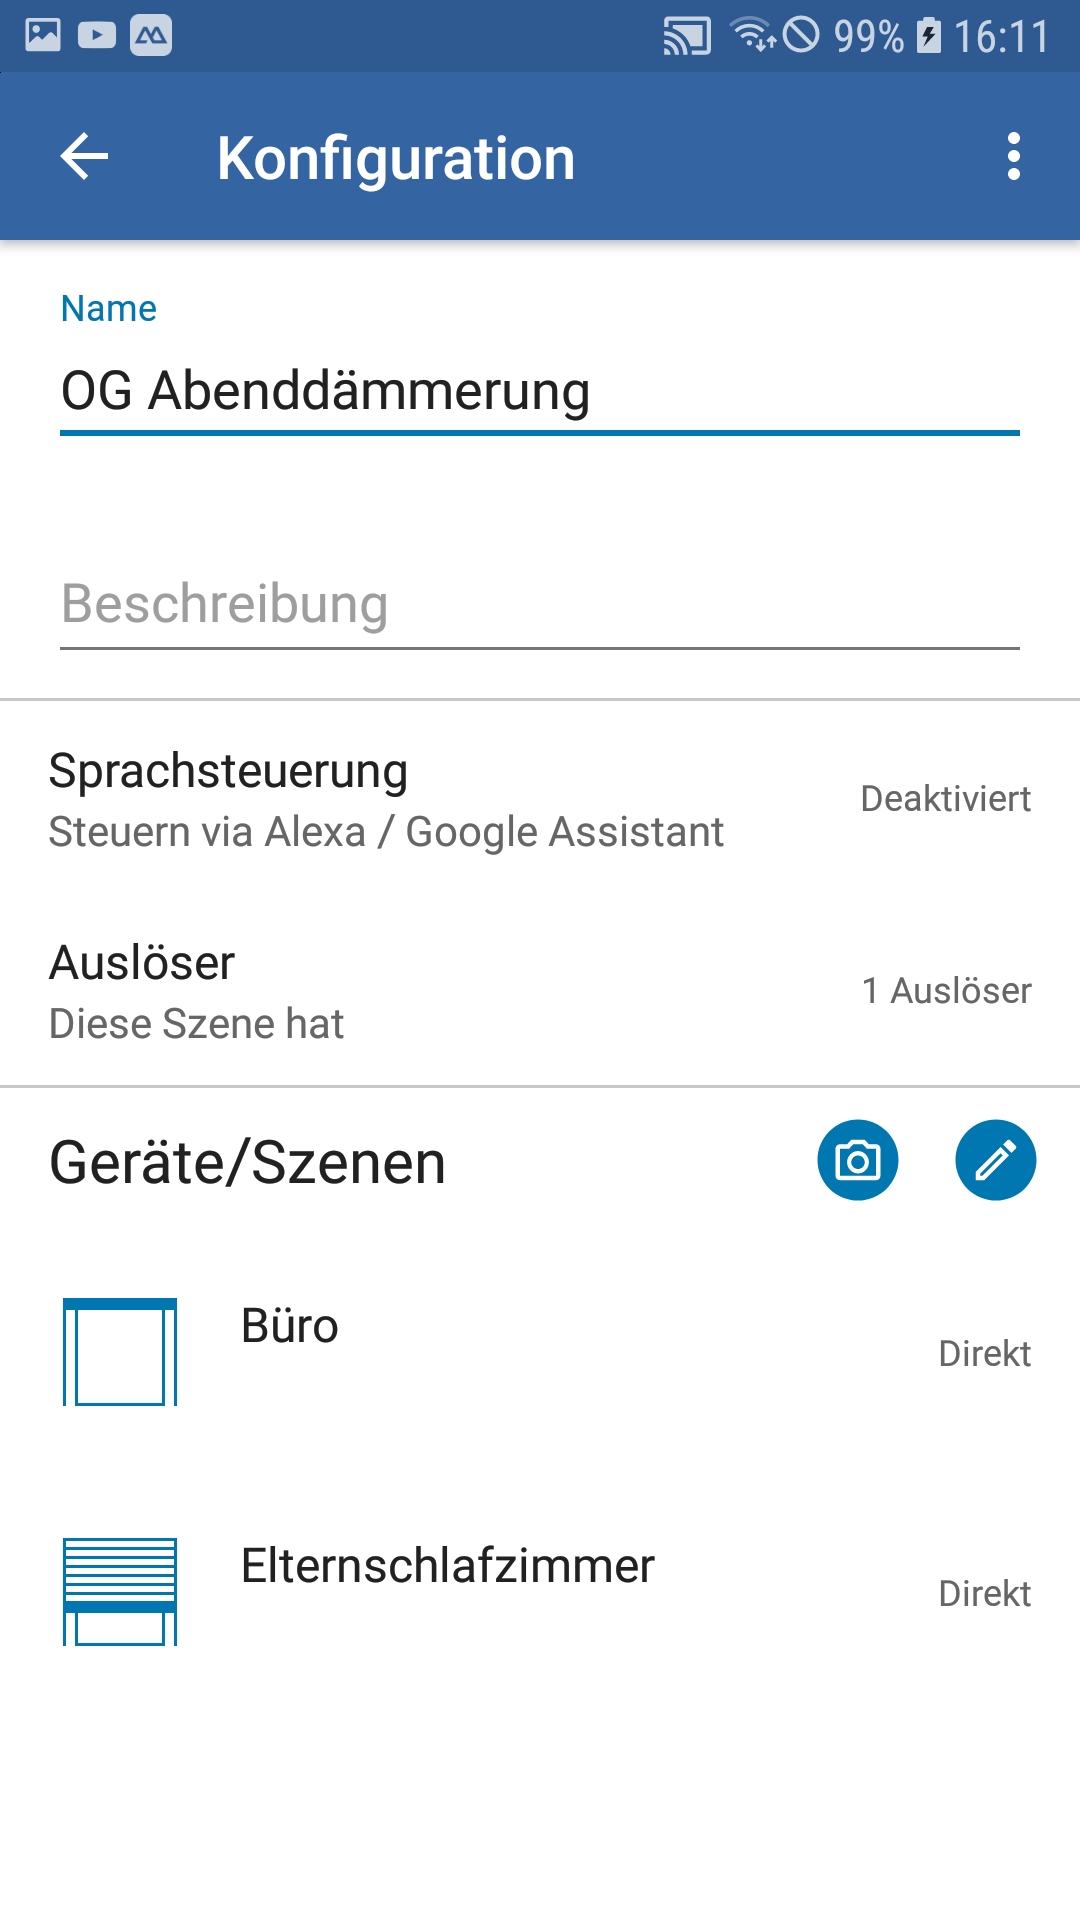
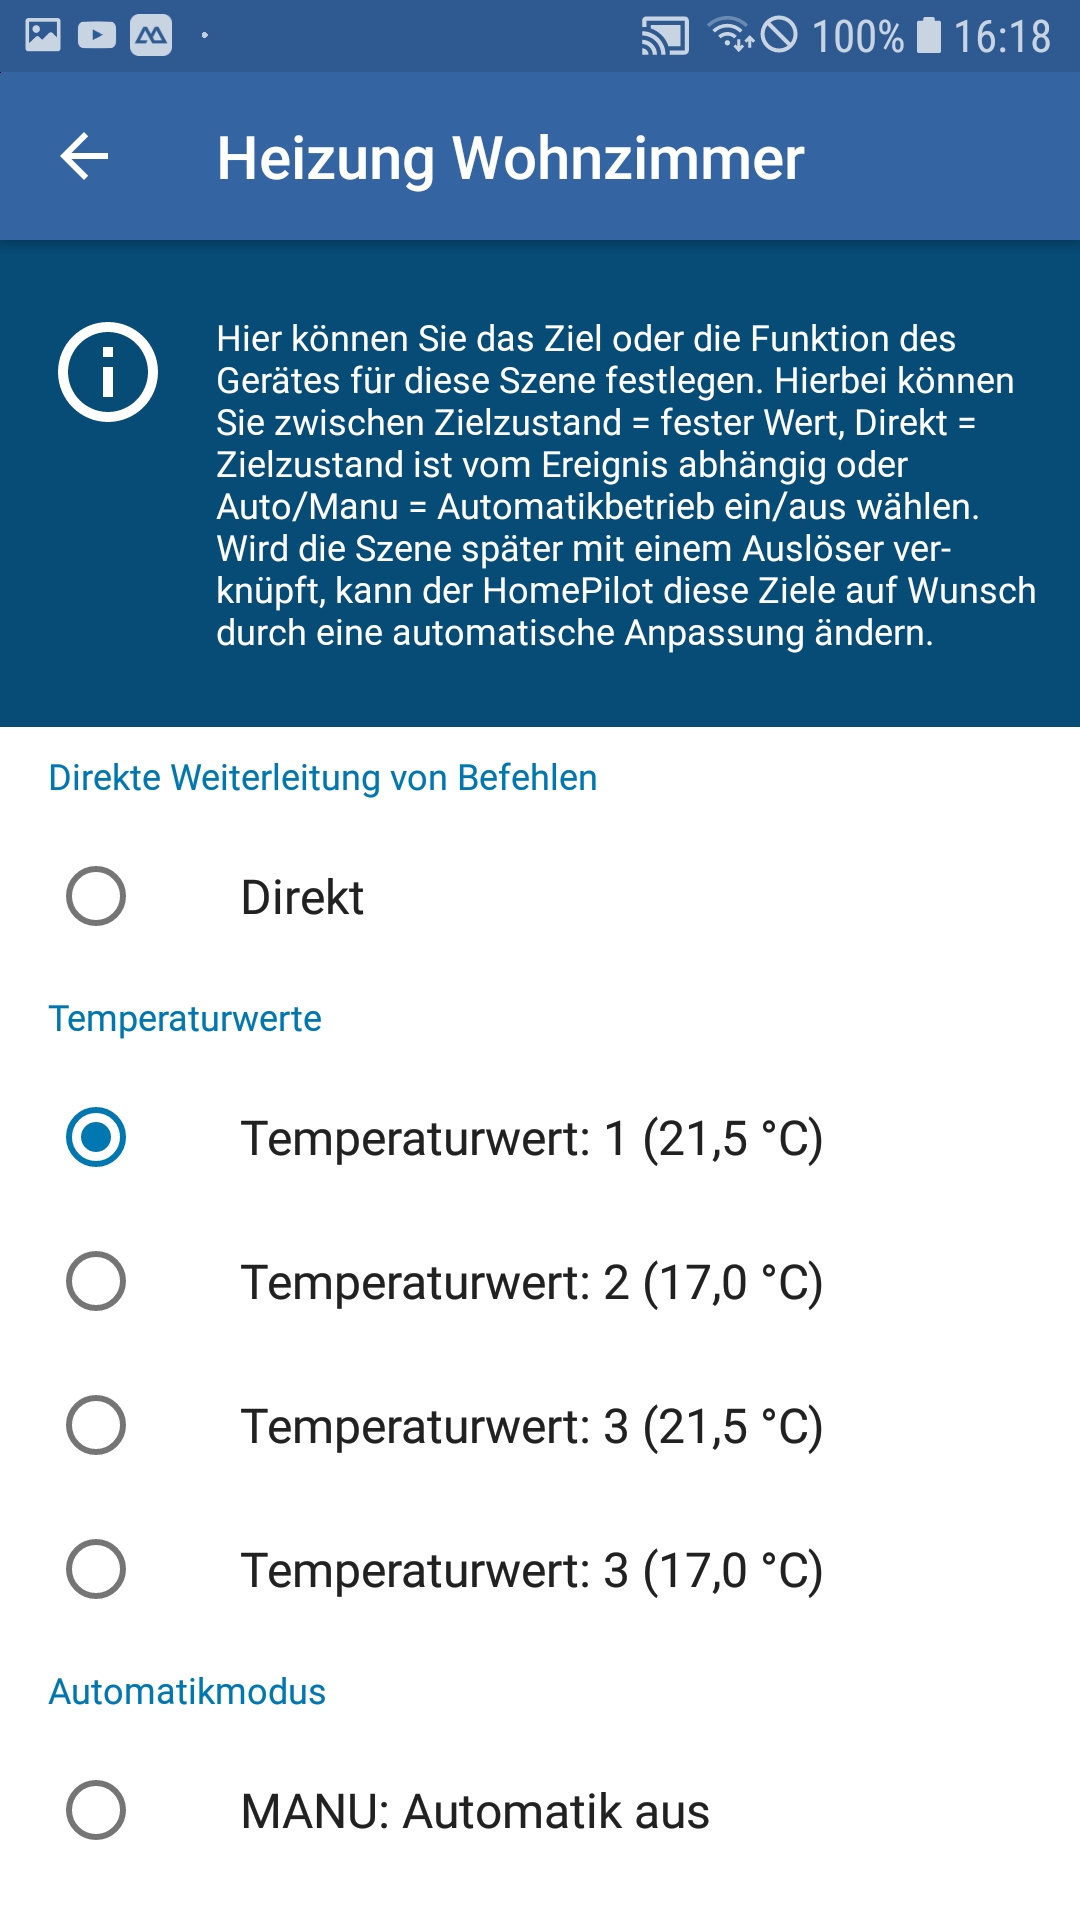
A scene usually contains one or more devices, each of which has a goal, e.g. move shutters 0% or turn on lights, approach temperature value, etc.
This scene can then be executed manually and all devices will control the set target. (Excluded are scenes where all devices are set to "Direct", see Info Direct)
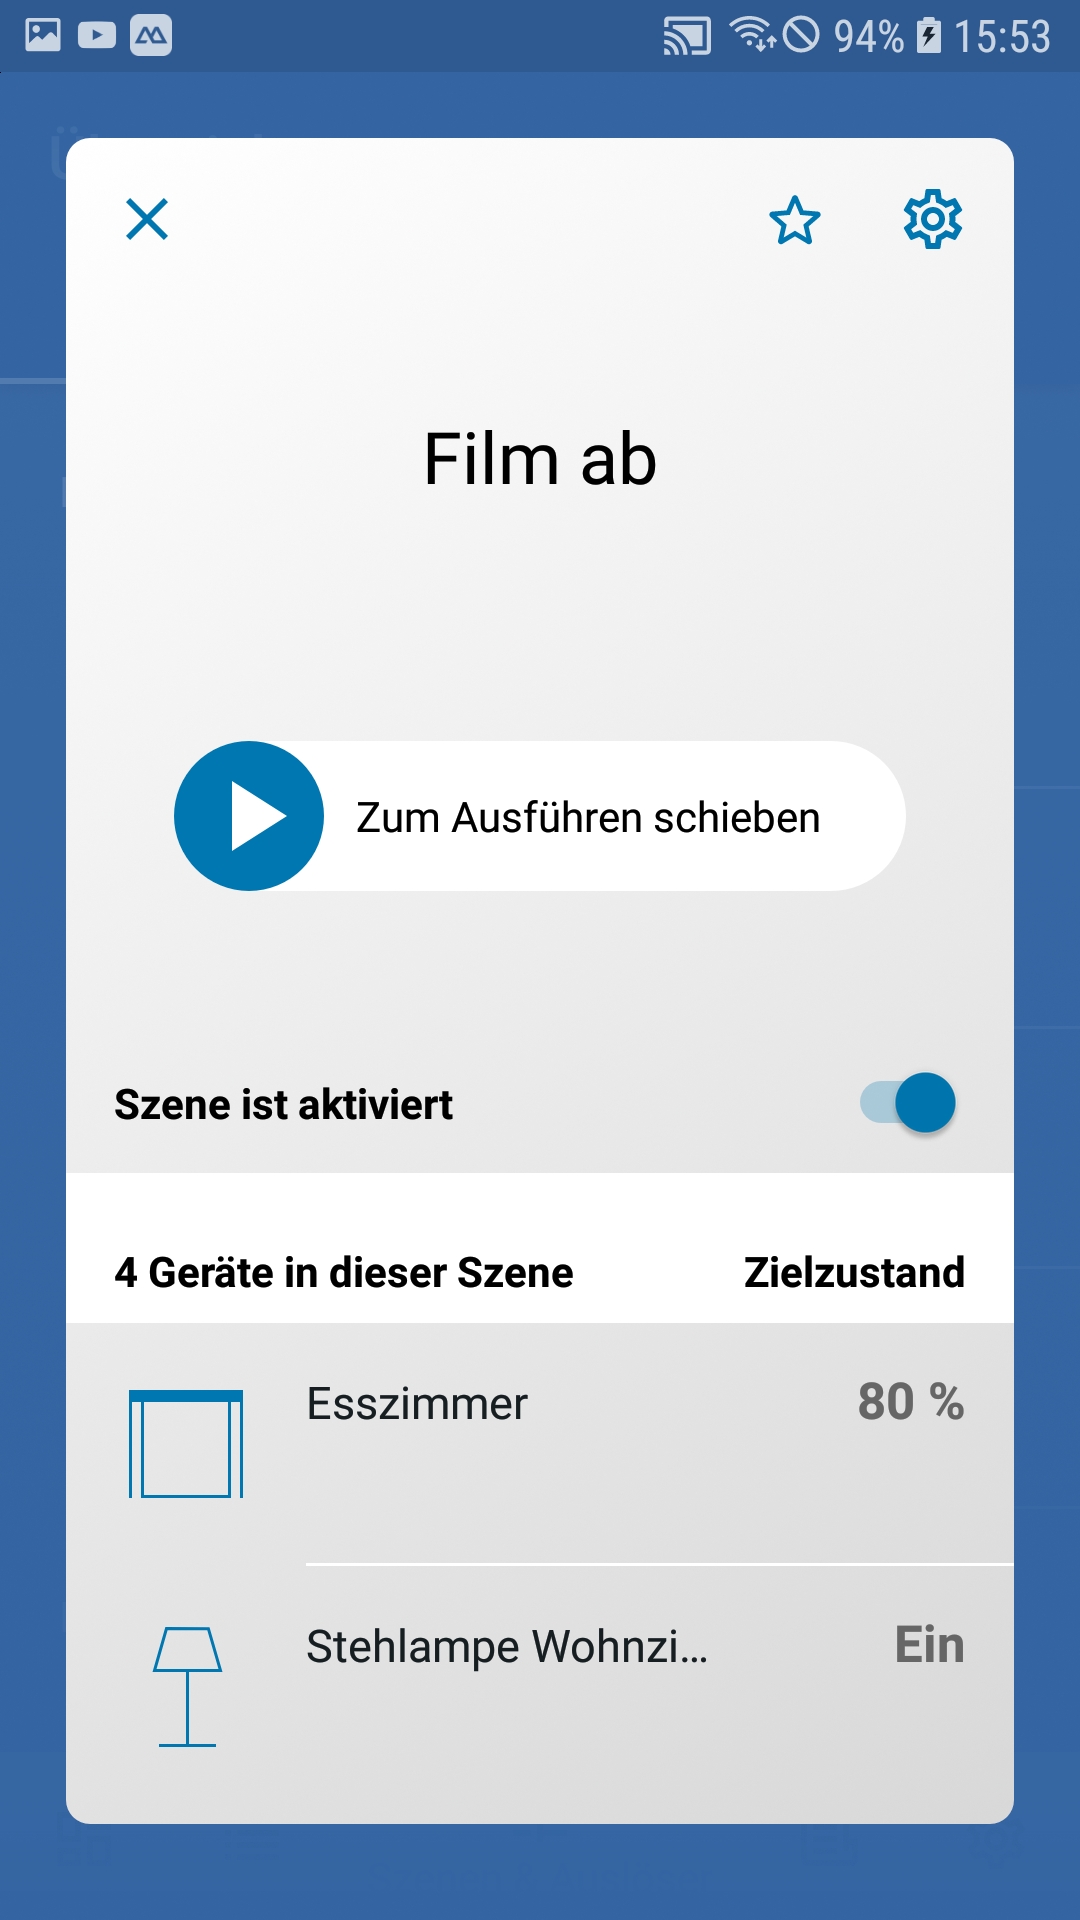
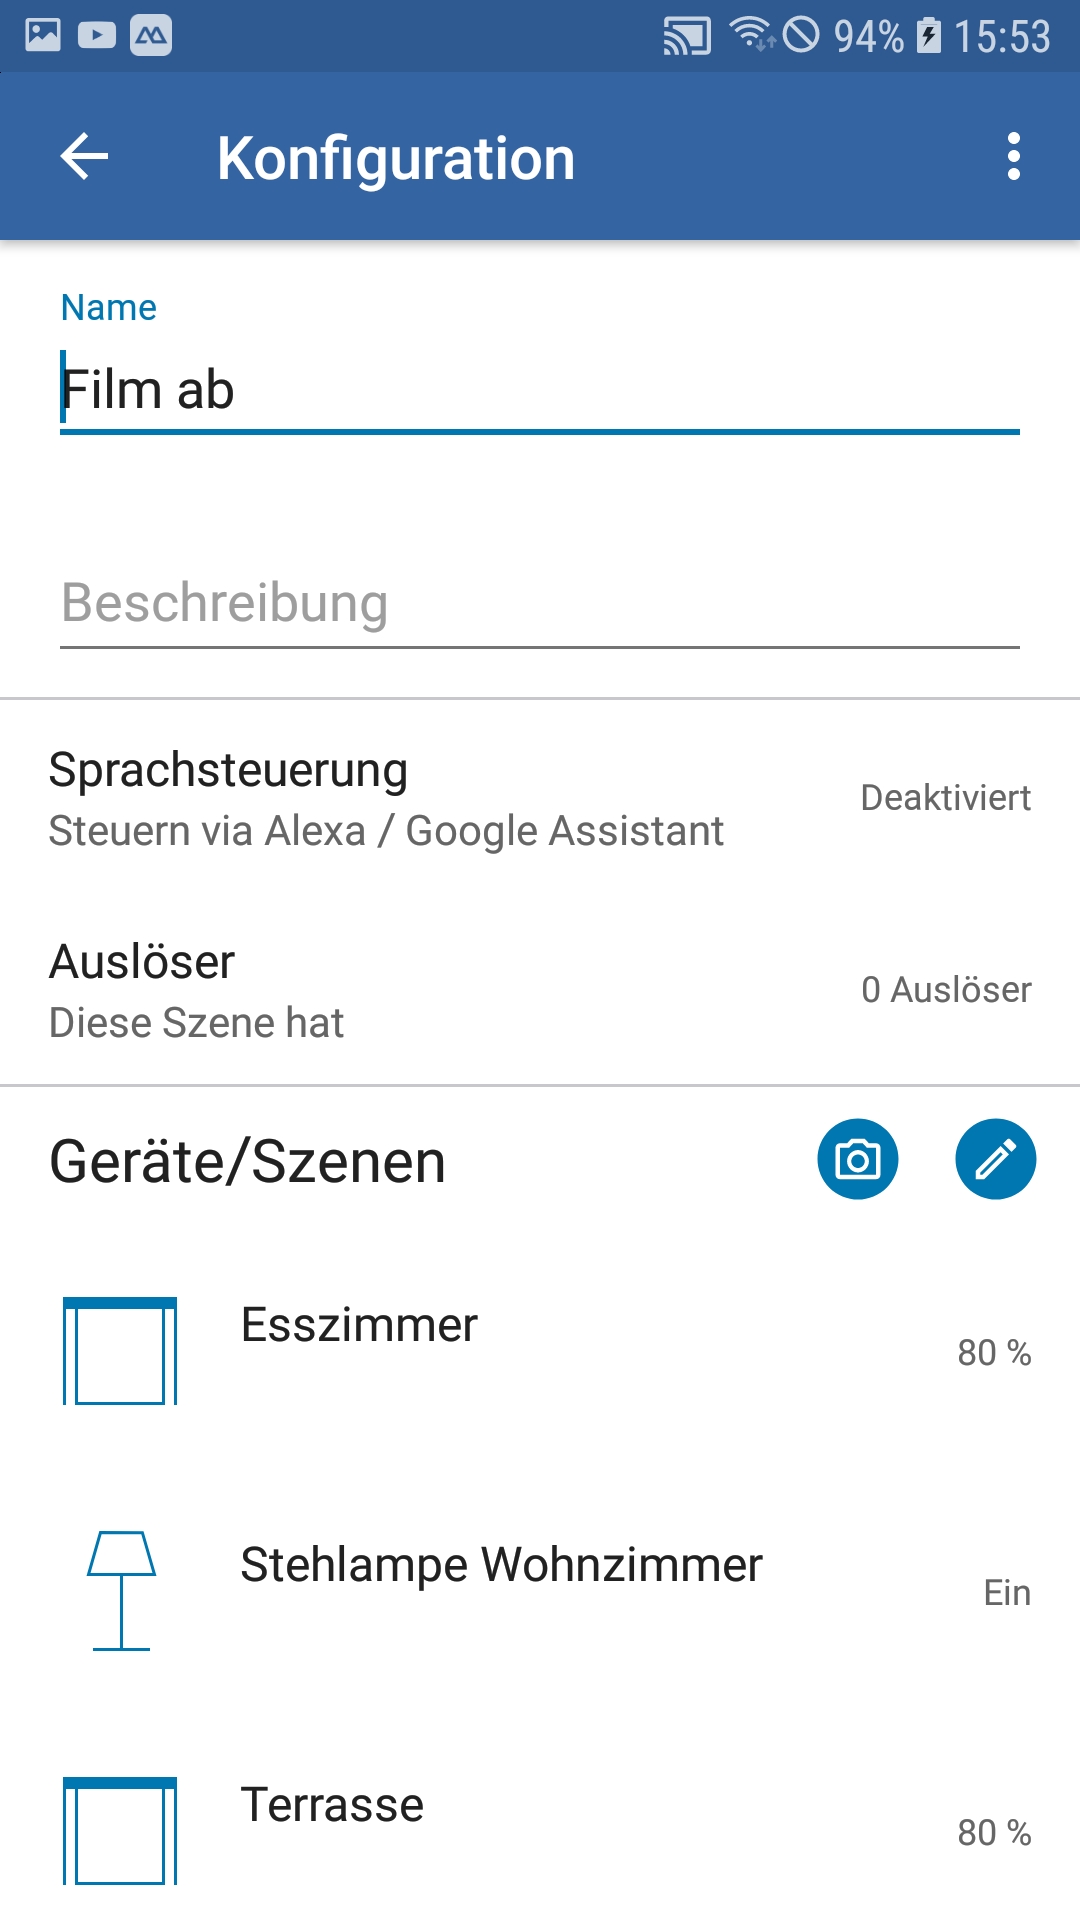
Example: Film From Scene On the
pictures you can see the current state of the device on the left side and the selected target state on the right side.
----------------------------------------------------------------------------------------
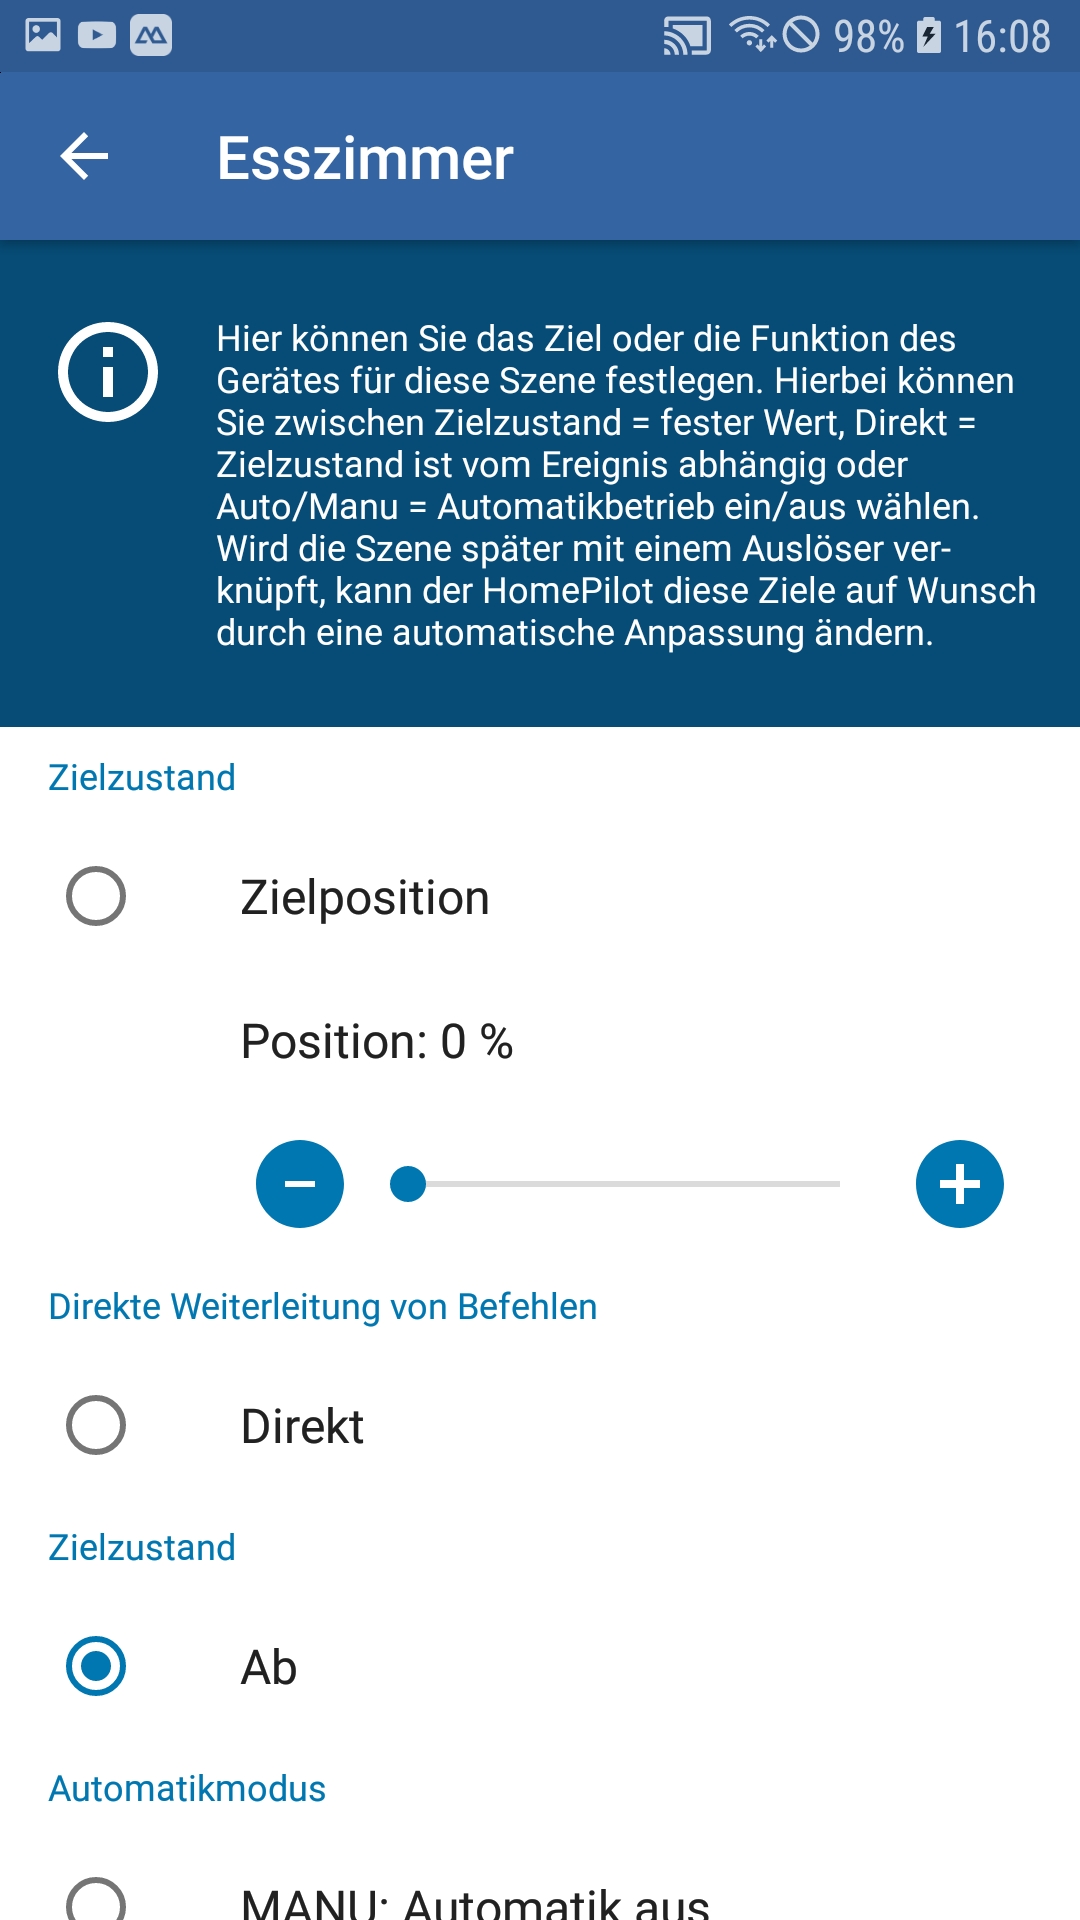
Which targets or functions can adevice have in a scene?
Depending on which device you are using, there are different targets or functions available, which are described in the following. These can be set and changed when the configuration of the scene is opened and then the device is clicked. On the left you can see the current state of the device. On the right, the target or the function of the device.
----------------------------------------------------------------------------------------
Target position:
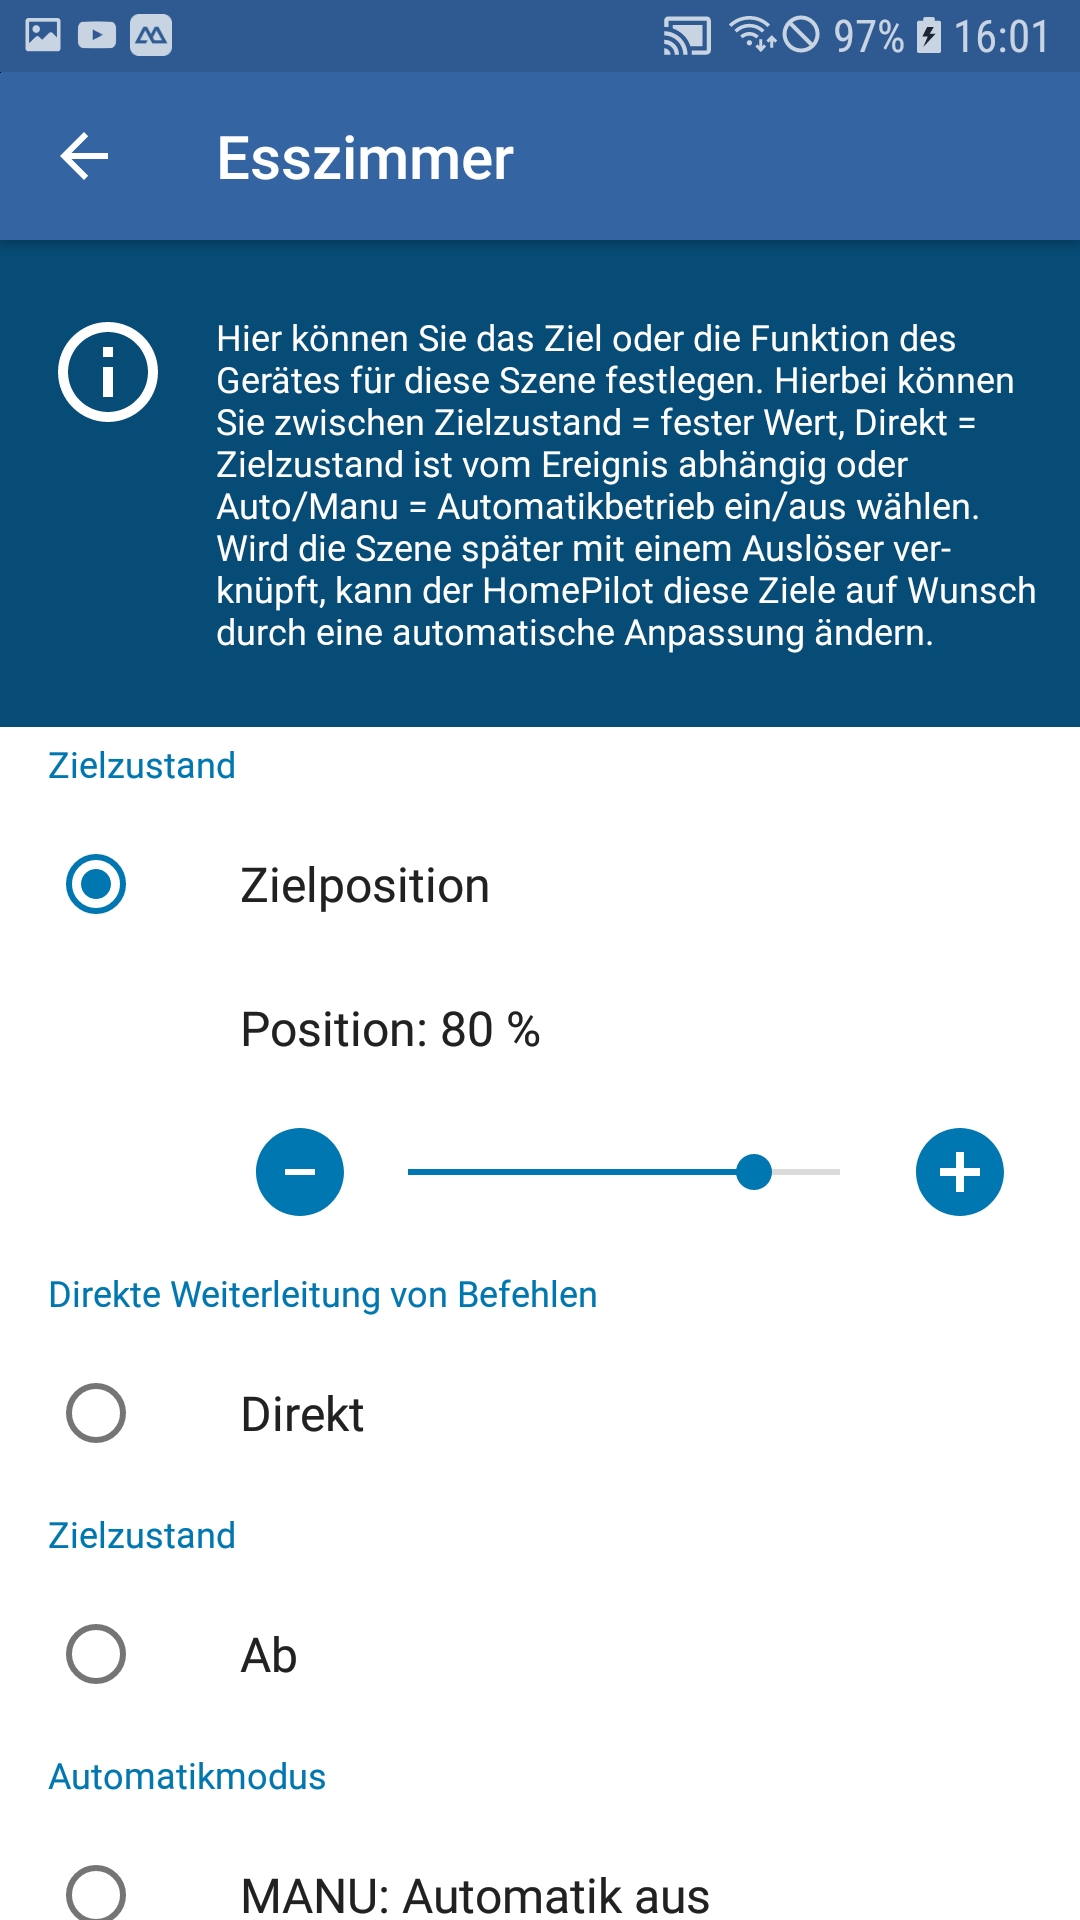
You can use the percentage value to define the position to which the motor moves your shading, to which temperature the heating is controlled via the radiator actuator or to which light value the dimmer is controlled when the scene is triggered.
The following applies to shading:
0% = open
100% = closed The
prerequisite for moving to percentage values is that the runtime has been measured and entered beforehand for external actuators.
Note: You must always switch on the automatic timer on the device so that it reacts to the different triggers.
If you use a transmitter control as a trigger, the automatic timer does not have to be switched on.
----------------------------------------------------------------------------------------
Slat position:
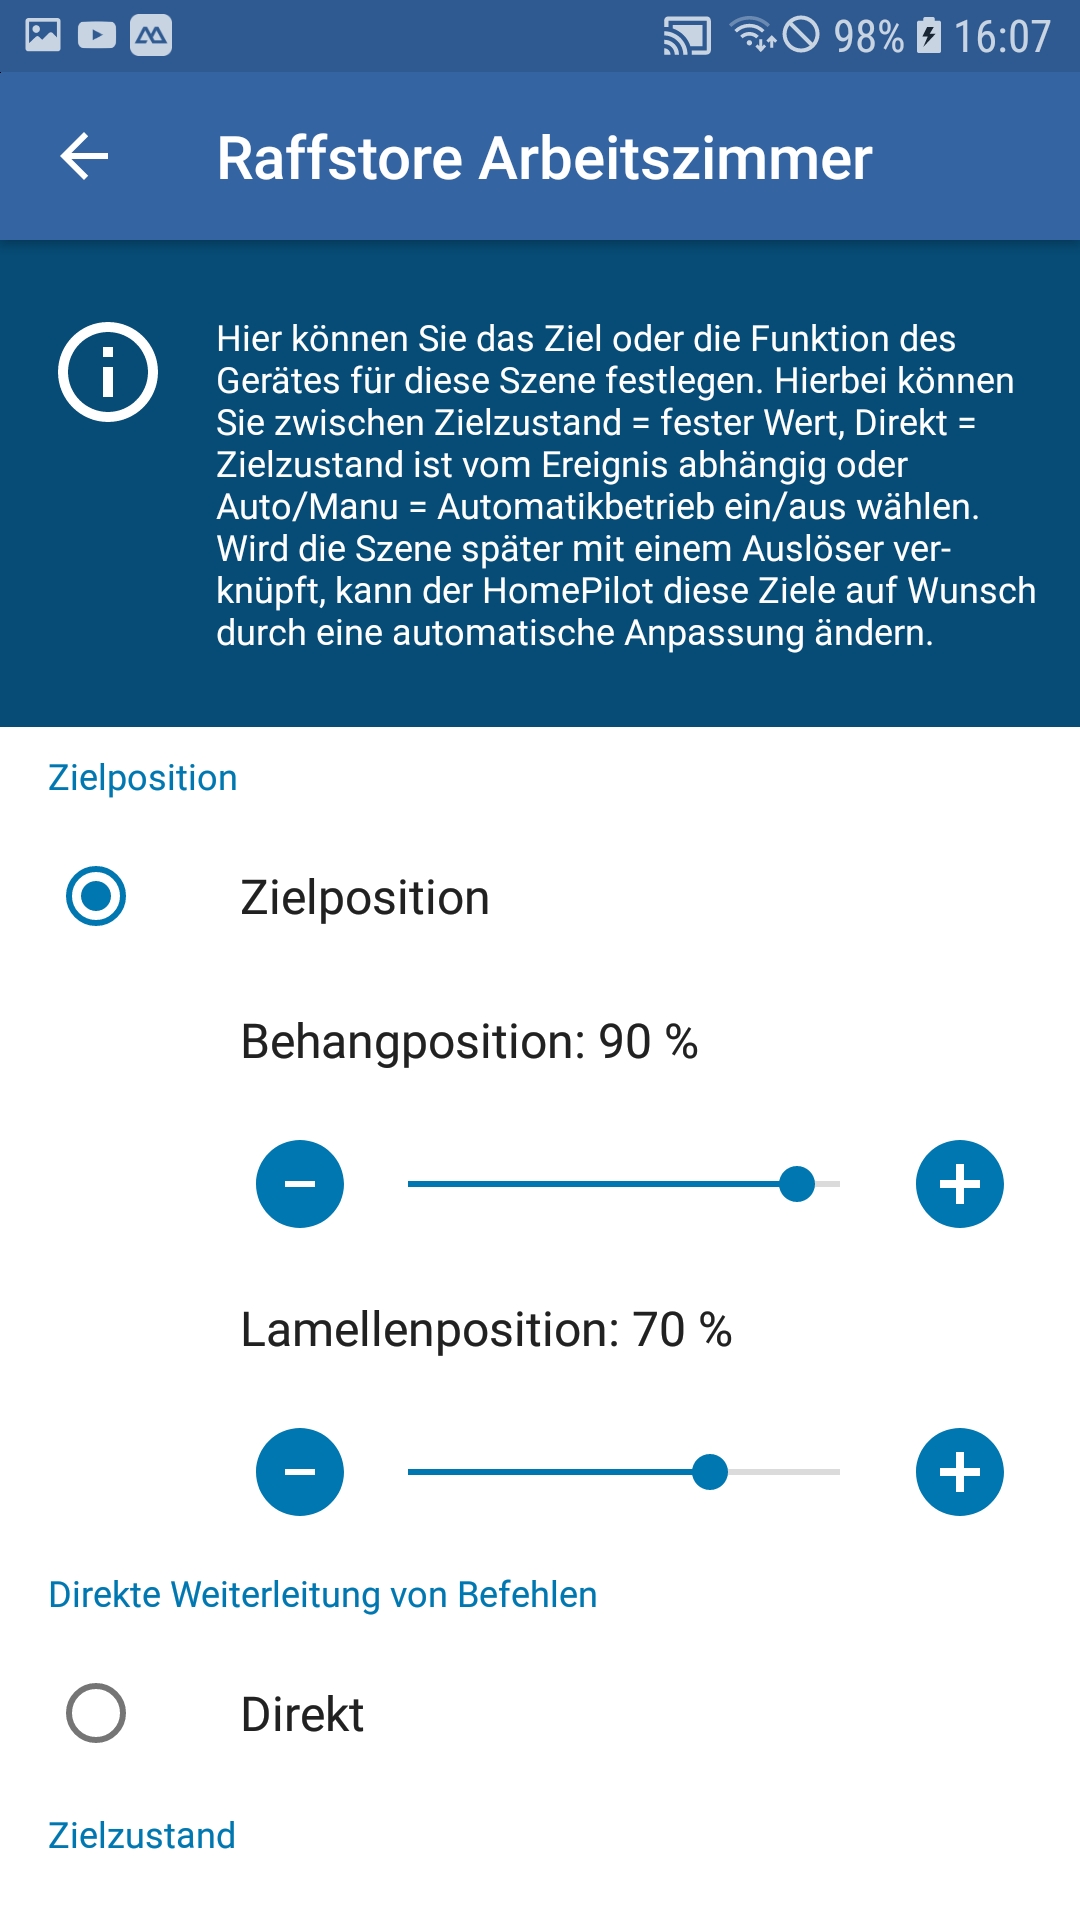
If you are using a receiver for external venetian blinds and have activated the blind mode in the device setting, you can also set a slat position in addition to the position. The external venetian blind would then, for example, first move to a position of 90% and then turn the slats to the position of 70%.
----------------------------------------------------------------------------------------
Down:
If Down is selected as the target, the shutter will move down and stop in the ventilation position if this has been activated and set in the device settings. This is the difference from the 100% target.
Note: You must always turn on the automatic timer on the device so that it reacts to the different triggers.
If you are using a transmitter control as the trigger, the auto timer does not need to be turned on.
----------------------------------------------------------------------------------------
Direct:
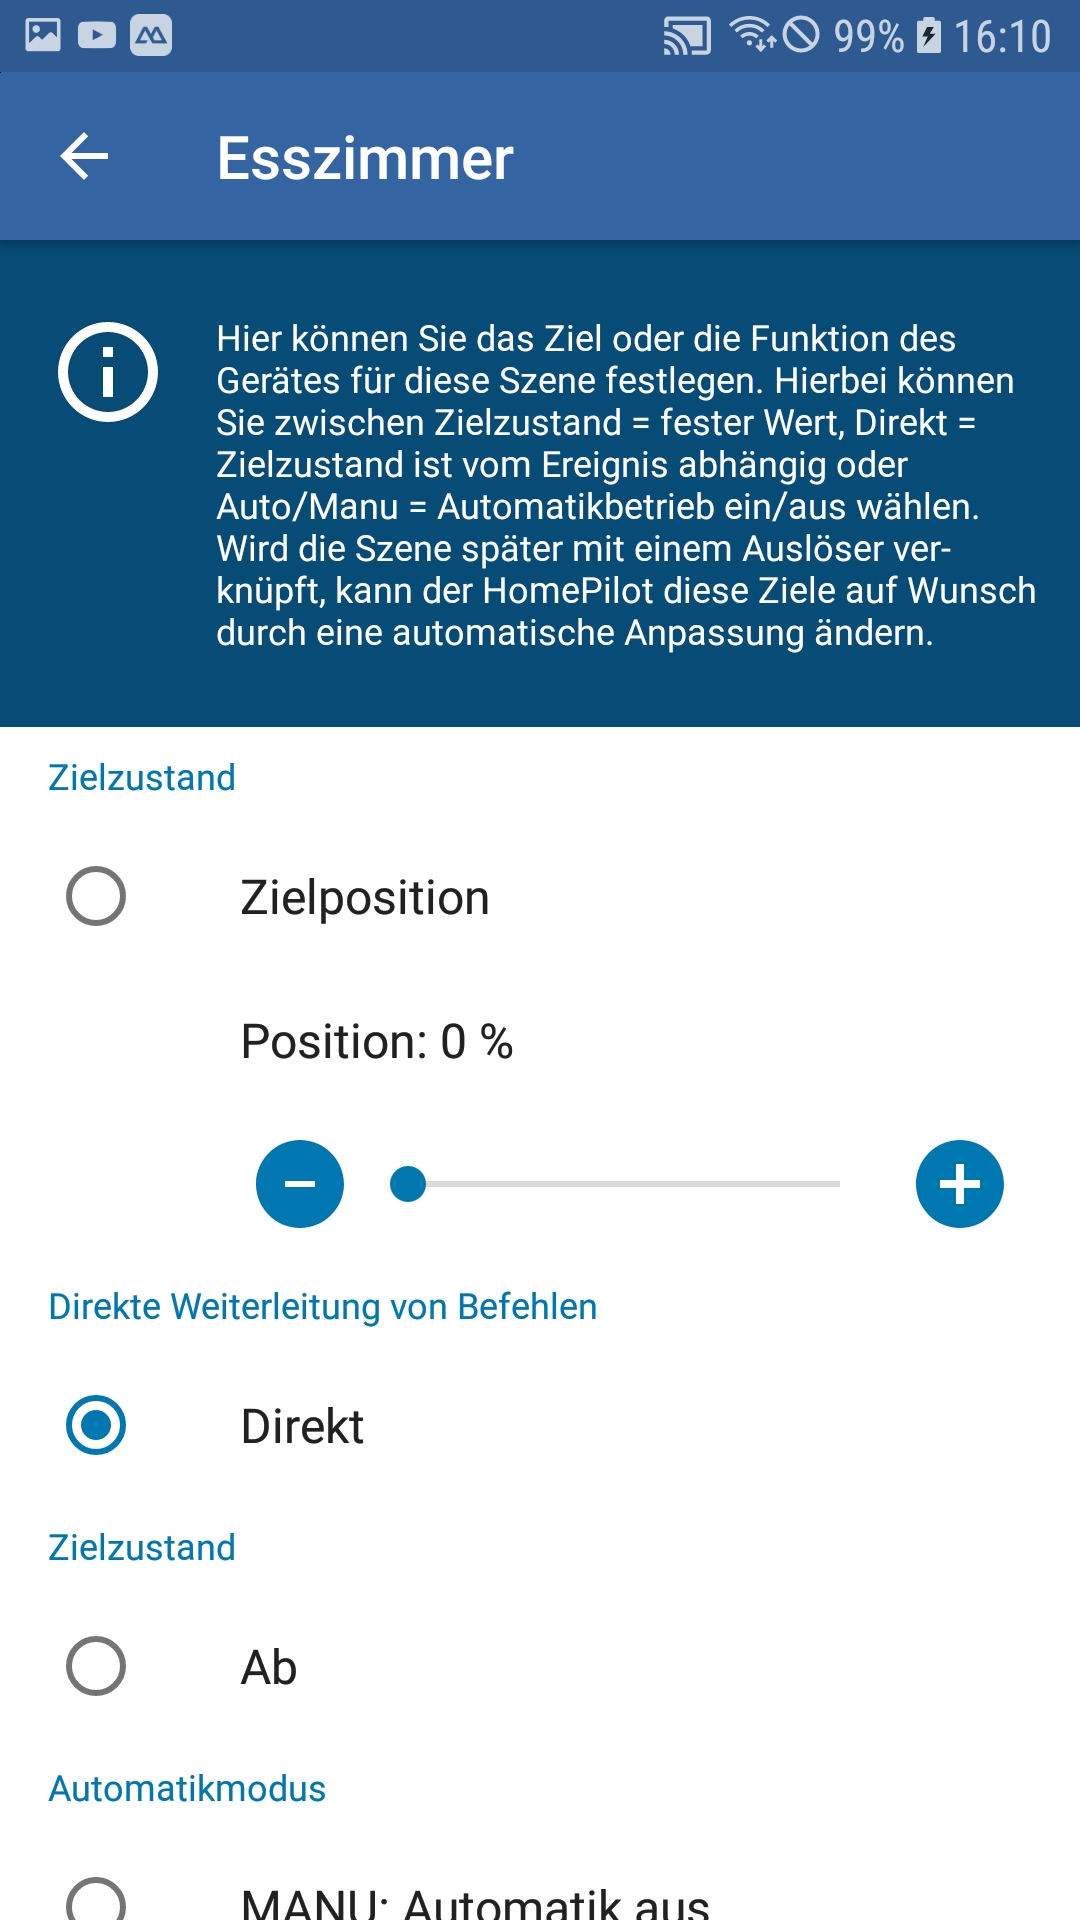
A special function that you can select on most devices is "Direct". If you select "Direct", the command of the trigger is directly forwarded to the device and processed.
Example: If you link a scene to the Dawn trigger, when dawn comes, the information is sent directly to the devices and the shutters open.
A scene with all devices set to "Direct" cannot be executed manually.
A scene with all devices set to "Direct" has no function without a suitable trigger.
----------------------------------------------------------------------------------------
Automatic on: (AUTO)

Select this destination if you want to use a scene to turn on the automatic function of your device.
Examples:
You want to switch on the automatic control of your shutter motor when closing the patio door.
You want to switch on the automatic control of all roller shutter controls centrally via a wireless pushbutton.
----------------------------------------------------------------------------------------
Automatic off: (MANU)
Select this destination if you want to switch off the automatic control of your device via a scene.
Examples:
You want to switch off the automatic control of your roller shutter motor when you open the patio door.
You want to switch off the automatic control of all roller shutter controls centrally via a wireless pushbutton.
----------------------------------------------------------------------------------------
On:
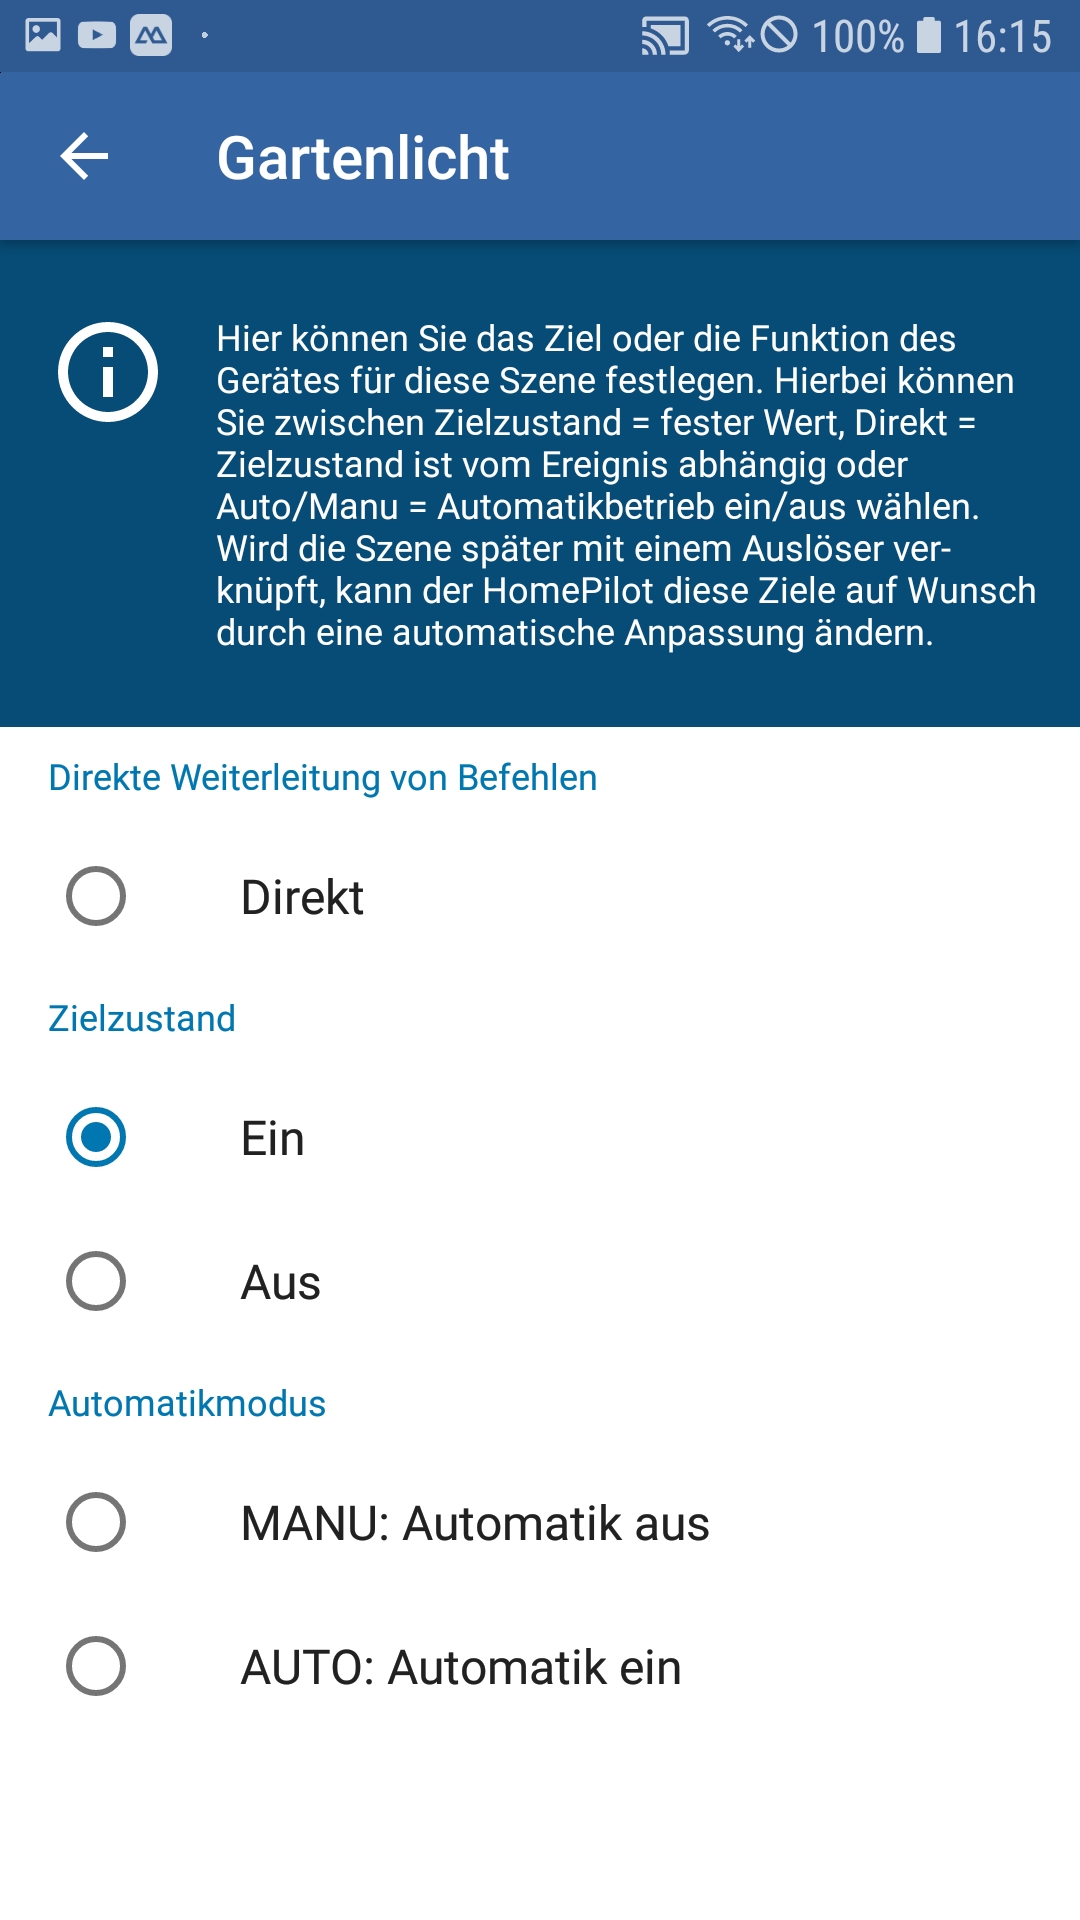
The device is switched on. If you control a dimmer with this command, the dimming process stops at the intermediate value, provided this is activated and set in the device setting.
Note: You must always switch on the automatic timer on the device so that it reacts to the different triggers.
If you use a transmitter control as the trigger, the automatic timer does not have to be switched on.
----------------------------------------------------------------------------------------
Off:
The device is switched off.
Note: You must always switch on the automatic timer for the device to respond to the different triggers. If you use a transmitter control as the trigger, the automatic timer does not have to be switched on.
----------------------------------------------------------------------------------------
Limit value:
The selected limit value is set as the target.
Note: You must always switch on the automatic timer for the device to react to the different triggers.
If you use a transmitter control as the trigger, the automatic timer does not have to be switched on.
----------------------------------------------------------------------------------------
TRIPLERS:
All information about the triggers can be found at the following link:
What are triggers?